
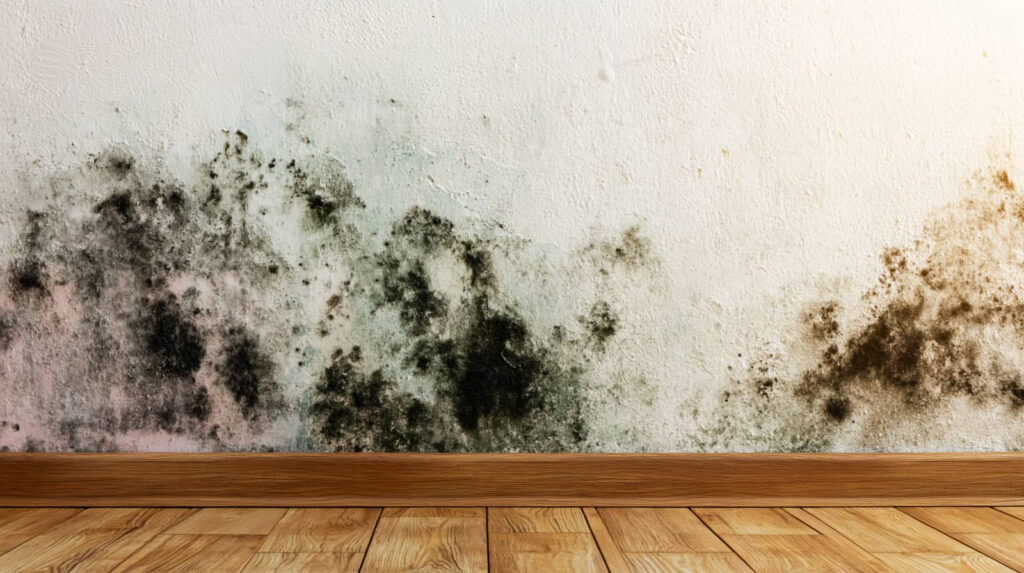
Mold remediation involves more than surface cleaning when you discover mold in your home. Proper mold remediation starts with identifying the moisture source, containing the affected area, removing contaminated materials when necessary, and ensuring the space is thoroughly dried. Professional remediation also includes checking for hidden moisture and addressing the underlying cause to help prevent mold from returning. A thorough cleanup protects indoor air quality and helps prevent a small mold problem from becoming a larger, more costly issue.
Key Takeaways
- Mold remediation removes contamination and fixes the moisture source to prevent mold from returning.
- Visible mold, musty odors, and water damage signs indicate the need for prompt inspection and cleanup.
- Proper remediation uses containment, HEPA filtration, and protective gear to limit spore spread and protect workers.
- Porous contaminated materials should be removed, sealed in bags, and disposed of according to local regulations.
- After cleanup, dry the area completely, verify moisture levels, and confirm safe conditions before rebuilding.
What Mold Remediation Covers
Mold remediation covers more than visible cleanup; it removes mold contamination, identifies and corrects the moisture source, and restores affected materials to safe condition.
You’re protected through containment, air filtration, controlled removal, cleaning, drying, and verification.
In mold remediation, you’ll see trained technicians isolate work areas, use HEPA equipment, and handle porous materials that can’t be reliably cleaned.
They’ll also treat nonporous surfaces and document moisture readings so you know the fix addresses the cause, not just the symptom.
This process helps you return to a safer indoor environment with fewer airborne spores and less risk of reoccurrence.
When you understand mold remediation, you can ask better questions, choose qualified help, and feel confident your space is being restored correctly.
Signs You Need Mold Remediation
You should look for visible mold growth, since spotting colonies on walls, ceilings, or materials means contamination may already be established.
You may also notice musty odors, which often indicate hidden moisture and active fungal growth even when you can’t see it.
Water damage signs like staining, warping, or peeling finishes also signal conditions that can support mold and need prompt evaluation.
Visible Mold Growth
Visible growth on walls, ceilings, baseboards, or around windows is a clear sign that remediation is needed, especially when the staining appears fuzzy, patchy, or spreads after leaks or high humidity.
You need to act fast and protect your indoor environment.
- Inspect all visible spots with a flashlight and note every affected surface.
- Isolate the area to limit spore spread and reduce exposure.
- Fix the moisture source before you clean or remove materials.
- Schedule professional remediation when growth covers porous materials or keeps returning.
Musty Odors
A persistent musty odor often signals hidden mold growth, even when surfaces look clean, and it usually points to moisture trapped behind walls, under flooring, or inside HVAC components.
You should treat that smell as a warning, not a nuisance. If the odor strengthens when your system runs or after a room sits closed, you may have active contamination nearby.
Don’t mask it with fragrance; that only delays safe action. Inspect with a flashlight, wear gloves and an N95 if you disturb materials, and avoid opening suspect cavities without protection.
If the smell lingers after cleaning, drying, and ventilation, call a qualified remediation team. Early response helps protect your home, your health, and the sense of security your household deserves.
Water Damage Signs
Water stains, bubbling paint, warped flooring, and recurring damp patches often indicate an active moisture problem that can support mold growth. You should inspect these signs quickly, because hidden water intrusion can weaken materials and spread contamination.
In your home, watch for:
- Discolored ceilings or walls after leaks
- Soft drywall or spongy baseboards
- Buckled floors near plumbing or windows
- Rusted fixtures, swollen trim, or peeling caulk
If you notice any of these, act with your household: stop the source, dry the area, and document the damage.
Don’t ignore repeated wetness, even if surfaces look clean. Mold often follows water within 24 to 48 hours, so prompt remediation protects your space, your health, and the people who belong there.
How Mold Spreads in a Home
In your home, mold spreads when moisture lingers and airflow stays limited, because damp materials let spores colonize and expand.
You’ll often see growth on hidden surfaces first, such as behind walls, under flooring, or inside HVAC components, where conditions stay wet.
To stop spread, you need to control moisture fast and inspect concealed areas before contamination widens.
Moisture And Airflow
When moisture lingers and airflow stays limited, mold can spread quickly through porous materials, HVAC pathways, and hidden cavities. You reduce that risk by controlling humidity, drying wet areas fast, and keeping air moving.
If you belong to a household that acts early, you protect everyone’s health and your home’s structure.
- Fix leaks right away to stop continuous dampness.
- Run exhaust fans during showers and cooking.
- Keep supply and return vents unobstructed.
- Use dehumidifiers when indoor humidity stays above 60%.
You should also ventilate enclosed rooms, inspect condensation on cold surfaces, and dry fabrics or carpet padding promptly.
When air stays stagnant, spores settle and multiply faster. Clean, dry airflow helps you stay ahead of contamination and supports safer remediation.
Hidden Surface Growth
Behind walls, under flooring, and inside cavities, mold often grows out of sight before you notice a musty odor, staining, or warped materials. You may miss the source because spores ride dust, settling on damp drywall, insulation, framing, and subfloors.
Once moisture stays above safe levels, colonies spread across porous materials and into adjacent spaces through air leaks, plumbing chases, and HVAC returns. You should inspect after leaks, floods, or condensation, especially where ventilation is weak.
Check baseboards, attic sheathing, crawlspaces, and cabinet backs for discoloration or softness. If you disturb hidden growth, wear protective gear and isolate the area.
Safe remediation means removing contaminated material, drying thoroughly, and correcting the moisture path so your home stays healthy and everyone feels secure.
Find and Fix the Moisture Source
Before you remove mold, you need to find and stop the moisture source, because mold will keep returning if the underlying leak, condensation, or humidity problem remains.
You should inspect plumbing, roof penetrations, windows, HVAC drains, and damp foundations with a flashlight and moisture meter. Act quickly, but safely, and wear gloves and eye protection.
- Shut off active leaks.
- Dry wet materials with ventilation and dehumidification.
- Repair damaged seals, caulk, flashing, or insulation.
- Correct indoor humidity to keep surfaces dry.
When you track the source, you protect your home and the people in it. If the damage is extensive, call a qualified pro so you’re not carrying the burden alone.
Once the area stays dry, you can move forward with confidence.
What Your Remediation Plan Covers
Your remediation plan defines the full scope of contamination so you know which areas need containment, removal, and verification.
It also covers the moisture source repair, since you can’t complete remediation until you stop the conditions that support mold growth.
Finally, it specifies cleanup and disposal steps so you handle affected materials safely and prevent cross-contamination.
Scope Of Contamination
Once you identify mold, your remediation plan should define the full scope of contamination so you know exactly what gets removed, cleaned, or isolated.
You’ll map affected rooms, hidden cavities, porous materials, and nearby surfaces to keep the work controlled and safe. That clarity helps your team move as one.
- You’ll document visible growth and suspect areas.
- You’ll mark materials that can’t be salvaged.
- You’ll isolate contaminated zones to limit spread.
- You’ll verify adjacent spaces for cross-contamination.
A precise scope reduces guesswork, protects occupants, and supports consistent cleanup standards.
When everyone understands the boundary, you can trust the process and feel confident that nothing unsafe gets overlooked.
Moisture Source Repair
Fix the moisture source first so the remediation holds. You’ll identify where water enters, then correct it before any other step. Your plan may include repairing roof leaks, sealing flashing, servicing HVAC condensate lines, replacing failed caulk, and fixing plumbing leaks.
If humidity stays high, you’ll also need ventilation, dehumidification, or insulation upgrades to reduce condensation. You should verify the repair with moisture meters, visual checks, and, when needed, thermal imaging.
Keep affected materials dry during work, and shut off water or power only when it’s safe to do so. When you tackle the source, you protect the space, support your crew, and reduce the chance of recurrence.
A solid repair gives you a safer, healthier environment for everyone who shares it.
Cleanup And Disposal
Clear out contaminated materials and control waste handling so the remediation plan actually resolves the problem. You remove porous items that can’t be reliably cleaned, bag debris at the source, and seal transport paths to limit spore spread.
Your crew should follow containment, PPE, and decontamination steps so everyone on-site stays protected and confident in the process. Disposal should match local regulations, and you need documented tracking for removed materials.
- Bag and seal waste.
- Remove damaged porous items.
- Clean hard surfaces with approved methods.
- Verify final clearance.
This approach helps you protect your home, your team, and your sense of control. When cleanup is precise, you’re not just removing mold—you’re restoring a safer space where you belong.
Mold Remediation Safety Gear and Prep
Before you enter a mold-affected area, put on proper PPE and prepare the site to limit exposure and spread. Wear an N95 or better respirator, gloves, eye protection, and disposable coveralls with hood and boot covers. Check that each item fits snugly; gaps let spores reach skin and lungs.
Remove rugs, drapes, and loose contents only after you isolate the space. Seal HVAC vents, close doors, and place plastic sheeting over openings to contain airborne particles. Keep a trash bag ready for contaminated wipes and disposable gear.
Set up adequate lighting so you don’t miss hidden growth. Turn off fans that can disperse spores. Work with a partner when possible, and follow your cleanup plan so everyone stays protected and coordinated throughout the job.
How Professionals Remove Mold Safely
Professionals remove mold by isolating the work area, controlling airborne spores, and eliminating the moisture source that allowed growth to develop.
You’ll see them use negative air pressure, HEPA filtration, and disciplined cleaning methods to keep contamination from spreading. Their goal is to protect your home, your health, and the people who live with you.
- They verify conditions before starting.
- They wet-clean surfaces to reduce dust.
- They HEPA-vacuum visible residue and nearby dust.
- They retest the area to confirm safer conditions.
You stay informed, and that matters. When you work with trained specialists, you’re not facing this alone; you’re joining a team that follows strict controls, documents each step, and restores confidence through careful, measurable work.
When Materials Must Be Removed
Some materials can’t be cleaned safely and must be removed to stop mold from spreading. You should remove porous items that stay contaminated after cleaning, including drywall, insulation, ceiling tiles, carpet padding, and water-damaged textiles.
If the material is warped, crumbling, delaminated, or holds hidden growth inside, it’s no longer reliable. You protect your space by bagging debris promptly, sealing it before transport, and preventing cross-contamination through controlled handling.
You also need to remove any material that keeps wicking moisture from a concealed source, because mold will return. When you work with a qualified team, you’re not just discarding damaged contents—you’re protecting the people who share your home or building.
Clear removal decisions keep your remediation plan focused, safe, and effective for everyone.
Dry and Restore the Area
Once contaminated materials are removed, you need to dry the area completely and restore safe conditions before rebuilding.
Use dehumidifiers, air movers, and measured moisture checks until framing, subflooring, and cavities read dry. If you rush, hidden dampness can damage your progress and leave your space unsafe.
- Inspect every surface with a moisture meter.
- Run equipment until readings match unaffected areas.
- Clean remaining dust with HEPA vacuuming and damp wiping.
- Verify that insulation, drywall, and finishes are ready for reconstruction.
You’re not doing this alone; every careful step helps protect the people who share your home.
Keep the work zone isolated while drying, and document readings so you can move forward with confidence and a clean, stable environment.
How to Prevent Mold From Returning
To keep mold from returning, you need to control moisture, improve airflow, and fix the conditions that let growth start in the first place.
You should keep indoor humidity below 60% with dehumidifiers or HVAC settings, and you need to repair leaks fast, including roofs, pipes, windows, and appliance connections.
Vent bathrooms, kitchens, and laundry areas outdoors, and run fans long enough to clear damp air.
Dry wet materials within 24 to 48 hours, or replace porous items that stay saturated.
Clean gutters, slope drainage away from the foundation, and inspect crawlspaces and basements regularly.
You’re part of a safer home when you keep clutter down, watch for musty odors, and document problems before they spread.
Frequently Asked Questions
How Much Does Mold Remediation Usually Cost?
You’ll usually pay $500 to $6,000, but severe contamination can reach $10,000 or more. You should inspect first, fix moisture, and get professional containment, because costs rise fast when damage spreads.
Does Insurance Cover Mold Remediation?
Sometimes, yes—many homeowners’ mold claims get limited or denied. You’ll need your policy to confirm coverage, especially if a covered water loss caused the mold. Act fast, document damage, and protect your home.
How Long Does Mold Remediation Take?
It usually takes you one to five days for small jobs, and longer for extensive damage. You’ll need drying, containment, removal, and verification, so your team should inspect moisture sources before restoring the area.
Can I Stay in My Home During Remediation?
Yes, you can stay in your home during remediation if the affected area’s isolated and ventilation’s controlled. You’ll need to avoid work zones, follow containment rules, and leave if you notice airborne spores or strong odors.
When Should I Test for Mold After Remediation?
Test after remediation only when surfaces are fully dry and the moisture source is fixed; otherwise, you’ll likely get false positives. Verify containment and cleanup first, then schedule clearance testing 24–48 hours later for confidence.
Review
If you act quickly, you can stop mold from spreading and protect your home’s structure and air quality. Mold often begins within 24 to 48 hours after moisture exposure, so fast response matters. You should identify the water source, remove contaminated materials safely, dry the area completely, and verify the repair. With proper remediation, you’ll reduce health risks, limit damage, and prevent recurrence. Ongoing moisture control is the key to keeping mold from coming back.