
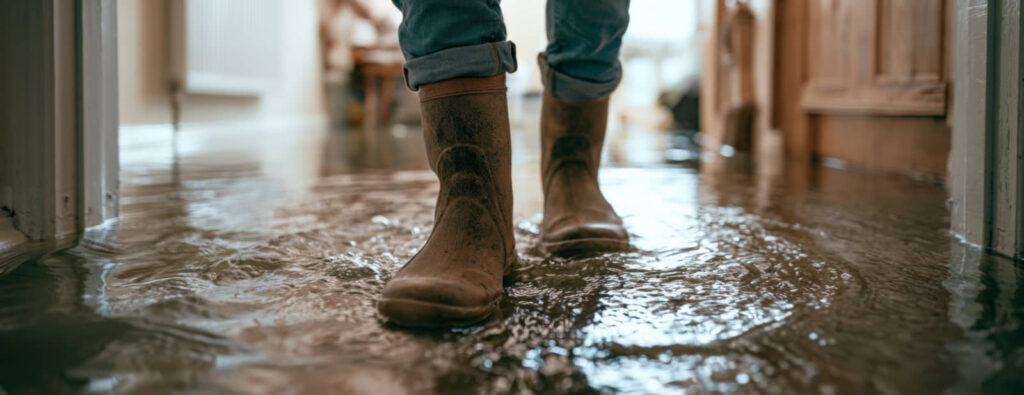
When water invades your space like a silent tide, you need to act fast and methodically. You’ll shut off power and water, document the damage, then remove standing water before it spreads into walls and flooring. Dry, clean, and sort what can be saved. The next steps matter even more, especially if moisture has already settled where you can’t see it.
Key Takeaways
- Turn off electricity to the affected area and close the main water valve to stop further flooding and reduce shock risk.
- Wear protective gear and inspect for structural hazards like sagging ceilings, warped floors, or loose materials before cleanup.
- Document all damage with photos, dates, and receipts for insurance claims before moving or discarding items.
- Remove standing water quickly, then dry the area with fans, dehumidifiers, and airflow while checking for hidden moisture.
- Clean and disinfect affected surfaces, discard unsalvageable materials, and call professionals for extensive or contaminated damage.
Start Water Damage Cleanup Safely
Before you begin water damage cleanup, turn off the electricity to the affected area if it’s safe to do so, and avoid contact with standing water near outlets, appliances, or damaged wiring.
Then put on rubber boots, gloves, and eye protection to reduce exposure to contaminants.
Check ceilings, floors, and walls for sagging, swelling, or loose materials before you step in. If the structure feels unstable, stay out and call a qualified professional.
Move lightly contaminated items to a dry, ventilated space, but don’t lift soaked drywall or carpet until you’ve documented the damage.
Good water damage cleanup starts with control, not speed. When you work methodically, you protect yourself, support your household, and set up faster drying, sanitation, and repair.
Shut Off Water and Power
First, locate your main water valve and close it to stop additional flooding.
Next, turn off electricity at the breaker if water has reached outlets, appliances, or wiring.
Then check for hidden hazards, including damaged gas lines, wet insulation, and unstable flooring, before you continue cleanup.
Locate Main Water Valve
Locate your main water valve right away so you can stop the flow at the source and limit further damage. Check the meter box, basement wall, utility closet, or the exterior foundation line; your shutoff is usually there.
Turn the valve clockwise until it stops, or lift the lever to the closed position on a quarter-turn valve. If you live in a shared building, confirm which valve serves your unit.
Keep a wrench nearby for a stuck gate valve, but don’t force damaged parts. Once the water stops, open a faucet to relieve pressure and verify the line is closed.
Knowing this location before an emergency helps you act fast, protect your home, and stay part of a prepared household.
Turn Off Electricity
Cut the electricity at the main breaker if water has reached outlets, appliances, or wet flooring near electrical components. Do this before you move equipment or start cleanup, so you reduce shock risk and protect the circuit panel.
If you can reach the breaker without standing in water, switch off the affected branch circuits first, then the main disconnect. Use a dry flashlight, not a corded lamp.
Tell everyone in your home to stay clear of plugged-in devices, wall outlets, and damp extension cords. Once power is off, mark the panel so no one restores it early.
If you can’t access the breaker safely, wait for a qualified electrician. Your crew’s safety comes first, and a careful shutdown keeps the cleanup on track.
Check For Hidden Hazards
Before you begin cleanup, check for hidden hazards and shut off any remaining water and power sources that could keep the damage spreading or create an electrical risk. You’re protecting everyone on site and keeping the job under control.
Locate the main water valve and close it fully.
Verify the circuit breaker is off for affected areas.
Watch for sagging ceilings, warped floors, or loose drywall.
Test for gas leaks if appliances were exposed.
Wear gloves, boots, and eye protection before entry.
If you smell fuel, hear hissing, or see structural movement, leave immediately and call the utility provider or emergency services.
A careful shutdown reduces secondary damage, supports safe drying, and helps your crew work with confidence.
Document the Damage for Insurance
You should photograph all affected areas before you start cleanup, including walls, floors, ceilings, contents, and any visible structural damage.
Keep the images organized with dates and notes so you can show the full extent of the loss.
Save every receipt and repair estimate, since insurers will use them to verify your claim and reimburse eligible costs.
Photograph All Affected Areas
As soon as it’s safe to enter the area, photograph every affected room, surface, appliance, and damaged item from multiple angles to create a clear insurance record. Use good light, steady framing, and close-ups plus wide shots so you can show scope and detail.
Keep moving through the space methodically, and don’t skip hidden spots where water traveled.
- Capture walls, floors, ceilings, and trim
- Include soaked furniture, electronics, and textiles
- Show standing water, stains, and warped materials
- Photograph serial numbers and model labels
- Date-stamp images if your device allows it
Save the files in one labeled folder, and back them up right away.
When you document thoroughly, you help your claim stay organized and support your team’s recovery.
Save Receipts And Estimates
Keep every receipt, contractor estimate, and emergency service invoice in one dedicated file so you can document the full cost of the water damage.
You’ll want dated records for pumping, drying, demolition, mold treatment, and temporary housing, because insurers often require itemized proof.
Ask each vendor for a written scope, labor rate, materials list, and total due, then compare them before you authorize work.
If you pay by card or check, save the statement or copy too.
Label each document with the property address and claim number, if you have one.
Share your file with your adjuster promptly so you and your insurance team stay aligned.
Well-organized paperwork helps your community of homeowners recover faster and strengthens your claim review.
Remove Standing Water
Quickly remove standing water to limit further damage and reduce the risk of mold growth, structural deterioration, and contamination. You should act with purpose, using pumps, wet vacuums, or buckets, depending on the depth and access.
If the water is near electrical outlets, shut off power first and stay clear until it’s safe. Work from the lowest point toward exits so you don’t trap more water inside. If you’re part of a cleanup crew, stay coordinated and communicate hazards clearly.
- Wear gloves and waterproof boots
- Use pump equipment for deep water
- Empty wet vacuums often
- Keep pathways clear for removal
- Monitor for hidden pockets of water
Remove as much water as possible before moving on, and document conditions for your records.
Dry Walls, Floors, and Contents
Once the standing water is gone, dry walls, floors, and contents with steady airflow and controlled dehumidification.
Open interior doors, run fans across wet surfaces, and keep dehumidifiers operating until materials stabilize.
Lift furniture off damp flooring with blocks, remove rugs and cushions, and separate stacked items so air can move freely.
Wipe hard surfaces, then dry them thoroughly to prevent finish damage.
For drywall, pull baseboards only if needed and expose lower edges to moving air.
For wood floors, reduce moisture gradually; rapid heat can cause warping.
Bag wet textiles for separate cleaning.
You’re part of a team working toward a safe, dry home, so stay organized, label removed items, and monitor drying equipment daily.
Consistent airflow shortens downtime and supports reliable recovery.
Check for Hidden Moisture
Even after visible surfaces seem dry, you’ll need to check for hidden moisture in wall cavities, under flooring, behind baseboards, and inside cabinets. Use a moisture meter to confirm readings, and inspect insulation, trim, and subfloors for dampness.
If you miss trapped water, you risk swelling, odors, and structural decay, so stay methodical and trust your measurements. You’re not alone here; this step helps your home recover fully.
- Probe suspect areas at seams and penetrations.
- Lift a floor edge if readings stay elevated.
- Remove outlet covers and inspect nearby drywall.
- Check cabinet bottoms, toe kicks, and corners.
- Mark wet zones so you can track drying progress.
Clean and Sanitize Surfaces
Scrub all affected surfaces with a suitable detergent to remove dirt, residue, and organic matter before sanitizing.
Use clean water and microfiber cloths or nonabrasive brushes so you don’t drive contamination deeper into porous material.
After washing, apply a disinfectant labeled for the surface and the contamination type, and keep it wet for the full contact time on the product label.
Work top to bottom and from clean areas toward dirtier ones to limit spread.
Wear gloves and eye protection, and ventilate the space while you work.
Rinse if the label requires it, then dry the surface completely with fans or towels.
In a shared cleanup effort, these steps help your space feel controlled, safe, and ready for the next stage.
Decide What to Save or Replace
After cleaning, assess each item and building material for structural integrity, contamination, and drying potential so you can decide what to keep and what to discard.
You’ll make faster, safer choices when you sort by function, value, and damage level. Keep items that are solid, cleanable, and likely to dry without warping.
Replace materials that’ve lost strength, swollen, delaminated, or stayed saturated too long. In your cleanup team, use these checks:
- Solid wood framing with no distortion
- Nonporous items with intact finishes
- Upholstery with heavy soiling or odor
- Drywall that crumbles or softens
- Electrical parts with corrosion or water exposure
Label salvageable pieces, move them to a dry staging area, and document losses for your claim.
Prevent Mold Growth
Mold can start growing within 24 to 48 hours of water intrusion, so you need to remove moisture fast and keep affected areas dry. Open windows, run fans, and use dehumidifiers to lower indoor humidity below 60%.
Remove wet carpet, padding, drywall, insulation, and baseboards that stay damp. Clean hard surfaces with detergent and water, then dry them completely. You should separate porous materials from salvageable items so moisture doesn’t spread.
Check hidden spaces like closets, under cabinets, and behind furniture, because trapped water feeds colonies. Keep air moving across affected rooms and monitor for musty odors or discoloration.
If you stay organized and act quickly, you help protect your home and keep your space safe for everyone who lives there.
Call a Water Damage Cleanup Pro
When water has soaked into walls, flooring, or insulation, call a water damage cleanup pro to assess the extent of the damage and start remediation fast.
You’ll get a crew that measures moisture, maps hidden intrusion, and protects your home’s structure and air quality. They act quickly, so you’re not fighting mold, warping, or electrical hazards alone.
A qualified team will:
- extract standing water
- dry materials with industrial air movers
- sanitize affected surfaces
- remove unsalvageable debris
- document damage for insurance
You belong in a response plan that works, and pros bring the tools and training to finish the job correctly.
Don’t wait for damp spots to spread; schedule service as soon as you notice swelling, odor, or staining, and keep your space safe.
Frequently Asked Questions
How Do I Know if My Water Is Contaminated?
You’ll know it’s contaminated if it smells foul, looks cloudy, has debris, came from sewage or floodwater, or touched chemicals. Don’t drink it; test samples, and isolate affected areas until a professional confirms it’s safe.
What Items Can Be Safely Cleaned After Sewage Exposure?
You can safely clean hard, nonporous items—tile, glass, metal, sealed counters, and intact plastic—after sewage exposure. You’ll usually discard absorbent materials like carpets, drywall, insulation, and upholstered items, because contamination lingers there.
How Soon Should I Contact My Insurance Company?
Contact your insurance company immediately, ideally within 24 hours. You’ll strengthen your claim by reporting damage fast, documenting losses, and following their instructions for mitigation, photos, and receipts.
Can I Stay in My Home During Cleanup?
Usually, yes, but if you’ve got unsafe water, exposed wiring, or heavy mold, you shouldn’t. You can stay only in dry, unaffected areas while crews extract water, dry materials, sanitize surfaces, and monitor conditions.
What Documents Do I Need for a Water Damage Claim?
You’ll need your policy, photos, videos, repair estimates, inventory of damaged items, receipts, and any plumber or contractor reports. Keep dated notes and correspondence, so you can support your claim clearly and quickly.
Final Thoughts
After you’ve handled the water emergency, act like you’re steering a ship through rough seas: shut off power and water, document the wreckage, and pull out standing water fast. Then dry, clean, and sanitize every affected surface so moisture doesn’t take root like weeds in a cracked sidewalk. Decide what’s worth saving, watch for mold, and call a pro if the damage runs deep. Quick, careful cleanup helps you regain solid ground.