
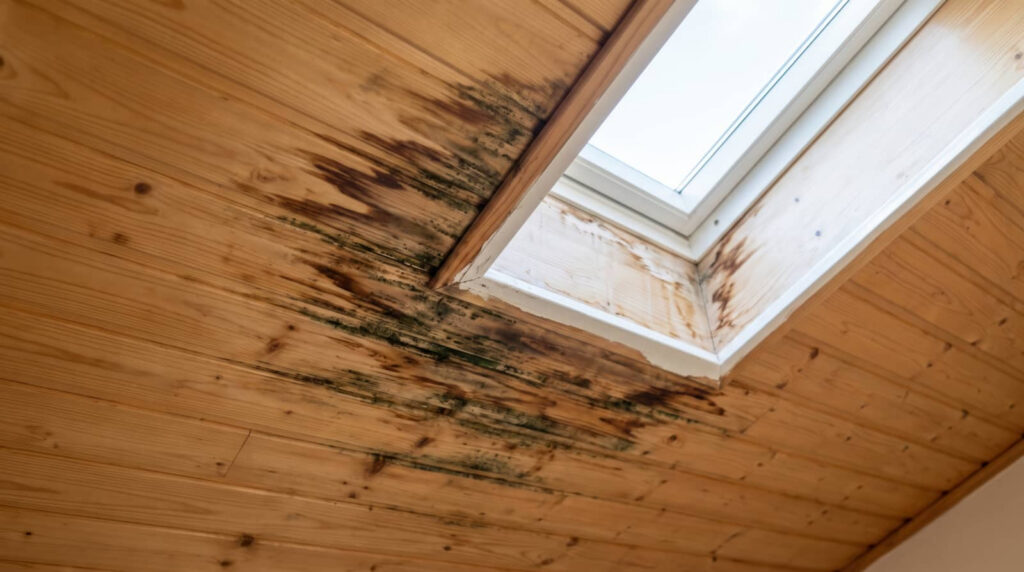
A ceiling stain is often the first warning sign of a hidden system failure. Water damage restoration for ceiling leaks should start by identifying the leak source quickly, especially if you notice yellowing, peeling paint, or a musty odor that points to trapped moisture. Left untreated, drywall can swell, mold can spread, and electrical wiring can become hazardous. The right repair approach depends on the extent of the damage, and the next step isn’t always obvious.
Key Takeaways
- Ceiling leak signs include yellow rings, peeling paint, sagging drywall, musty odors, and discoloration near vents or fixtures.
- Fast action limits drywall damage, mold growth, insulation loss, and electrical hazards.
- Find the leak source first by checking plumbing, roof penetrations, vents, and wet insulation above the stain.
- Restoration includes drying materials, removing damaged drywall or insulation, verifying safe moisture levels, and making targeted repairs.
- Prevent future leaks with regular roof, gutter, flashing, and plumbing inspections, plus proper attic ventilation and exhaust fan use.
Ceiling Leak Signs to Watch For
A few early signs can tell you a ceiling leak is developing before major damage sets in. You may notice yellow or brown rings, peeling paint, or soft drywall that feels damp to the touch.
Look for sagging areas, bubbling texture, and a musty odor, since hidden moisture often lingers above the surface. If you see small cracks widening near seams, inspect nearby plumbing, roofing, and attic spaces for water entry.
You should also check for discoloration around vents, light fixtures, and ceiling joints, where moisture collects first.
When these signs appear, water damage restoration for ceiling leaks can help you identify trapped water, document visible damage, and guide the right repair steps for your home.
Why Ceiling Leaks Need Fast Action
Once a ceiling leak starts, moisture can spread above the drywall, soak insulation, and weaken structural materials before the visible stain grows. You need fast action because delay lets damage compound and raises repair costs. Quick response helps you protect your home and stay ahead of hidden deterioration.
- It limits drywall swelling and sagging.
- It reduces mold growth in damp cavities.
- It helps preserve insulation performance.
- It lowers the chance of electrical damage.
When you act early, you keep the problem contained and make restoration simpler for everyone in your household.
That speed also gives you confidence, because you’re not letting a small failure turn into a larger, disruptive cleanup. Prompt water damage restoration supports safer living conditions and a faster return to normal.
Find the Leak Source Before You Repair It
Before you repair a ceiling leak, you need to locate the moisture entry point, not just the visible stain.
You can trace the leak path by checking above the damaged area for wet insulation, pipe joints, roof penetrations, or HVAC components.
If you repair the surface first, you’ll likely miss the source and let hidden water damage continue.
Locate Moisture Entry
Start by tracing the water’s path to its entry point, because you can’t fix a ceiling leak until you find the source. You need to locate where moisture first enters the assembly, not just where it appears below. Use targeted checks to confirm the entry point and protect your crew’s next steps.
- Inspect wet insulation, framing, and drywall edges.
- Check plumbing fixtures above the stain.
- Examine vents, penetrations, and fastener points.
- Measure moisture with a meter to verify active intrusion.
When you identify the source early, you can plan repairs with confidence and keep your home in the restoration process.
That precision helps you avoid repeat damage, control costs, and move forward with your team.
Trace Leak Path
Trace the leak path from the visible stain back to the true entry point, because the wet spot below rarely matches where water is actually entering the ceiling assembly.
You should inspect framing members, fasteners, seams, penetrations, and vapor barriers for discoloration, swelling, or mineral tracks.
Follow gravity, slope, and air movement, since water can travel along joists before dripping through drywall.
Check plumbing runs, roof flashing, HVAC condensate lines, and bathroom fixtures above the ceiling.
Use a moisture meter to confirm suspect areas, and mark readings so you can compare zones.
If the stain spreads after rain or fixture use, you’ve narrowed the source.
When you document each clue, you and your restoration team can act together with confidence and repair the right section first.
What Happens During Ceiling Leak Restoration
During ceiling leak restoration, you first get a detailed leak source inspection to locate active entry points and hidden moisture.
Then, technicians dry the affected materials, remove damaged drywall or insulation, and verify that moisture levels have returned to safe limits.
After that, they complete targeted repairs to restore the ceiling and help prevent recurring water intrusion.
Leak Source Inspection
A ceiling leak inspection begins by locating the water source, because hidden moisture can travel away from the visible stain. You’ll work with a technician who checks roof penetrations, plumbing lines, HVAC condensate, and attic conditions to narrow the path of intrusion.
They may use moisture meters and visual mapping to confirm where water entered and how far it spread.
- Trace the stain’s edge.
- Inspect above the ceiling cavity.
- Verify nearby fixtures and joints.
- Document findings for your claim.
This process helps you understand the problem clearly and feel confident about the next steps.
When you know the source, you can protect your home, avoid repeat leaks, and stay connected to a team that handles the issue with care.
Drying And Repairs
Once the leak source is controlled, drying starts immediately to limit further damage and prevent mold growth.
You’ll see technicians remove wet insulation, open ceiling cavities, and place air movers and dehumidifiers to drive moisture from framing and drywall. They monitor humidity, surface temperature, and moisture content with meters, so you know the structure is actually drying, not just appearing dry.
If drywall is swollen, sagging, or contaminated, they cut out damaged sections and replace them. Stains may need stain-blocking primer before repainting.
You’ll also get repairs to trim, tape, texture, and paint so the ceiling matches the surrounding area.
This process protects your home, restores indoor air quality, and helps you feel secure again in your space.
When Ceiling Drywall Needs Replacement
When ceiling drywall shows sagging, crumbling, persistent staining, or soft spots that won’t dry out, you’ll usually need to replace it rather than patch it. You’re dealing with material that’s lost structural integrity, and a repair won’t restore it fully.
Replace the section when:
- The gypsum feels spongy or delaminated.
- Joints have separated or the paper face has bubbled.
- Mold, odor, or discoloration keeps returning.
- The ceiling bows, cracks, or sheds debris.
You’ll also want removal if hidden moisture likely soaked insulation or framing behind it.
Cutting out the damaged panel lets you inspect the cavity, confirm the leak source is addressed, and rebuild with sound drywall.
That way, your ceiling looks right, performs safely, and you stay in a home that feels solid and cared for.
How to Prevent Future Ceiling Leaks
Preventing future ceiling leaks starts with eliminating the moisture source before it reaches the drywall. You should inspect roofs, flashing, gutters, and plumbing lines at least twice a year, then repair cracked seals, loose shingles, and corroded fittings quickly.
Keep attic insulation dry, ventilated, and evenly installed so condensation doesn’t collect above the ceiling. In bathrooms and kitchens, run exhaust fans during and after moisture-producing tasks.
If you spot stains, bubbling paint, or musty odors, trace the source immediately and document it. Schedule professional maintenance after storms or before seasonal temperature swings, because your home performs better when you stay ahead of hidden water.
When you protect these vulnerable points, you help your space stay safe, dry, and welcoming for everyone inside.
Frequently Asked Questions
How Do I Know if the Ceiling Leak Is From Plumbing or Roof Damage?
Check where the stain starts: plumbing leaks usually appear below bathrooms or pipes and worsen after water use; roof leaks often spread after rain and near exterior walls. You should inspect both or call a pro.
Can I Stay Home While Ceiling Water Damage Is Being Repaired?
You can stay home if the area’s contained, dry, and safe, but you’ll need to avoid the work zone. If you notice mold, sagging drywall, or active leaks, you should leave and let pros handle it.
How Long Does Ceiling Leak Restoration Usually Take?
Usually, you’ll wait 1–3 days for drying, then 1–7 days for repairs. You can speed things up by reporting leaks early, clearing access, and following your restoration crew’s instructions closely.
Will Insurance Cover Water Damage Restoration for a Ceiling Leak?
Usually, your homeowners insurance covers sudden ceiling leak damage, but not gradual wear or neglect. You’ll need documentation, prompt mitigation, and policy review. If you act quickly, you’ll strengthen your claim and protect your home.
Can Mold Grow Inside the Ceiling After a Small Leak?
Yes, you can, and you’ll often notice it when a faint stain matches a musty smell. Hidden moisture can feed mold in ceiling cavities, so you should inspect quickly and dry affected materials.
Final Thoughts
If you spot stains, peeling paint, or a musty odor, you need to act fast. You should trace the leak source before you repair the ceiling, because hidden moisture can weaken drywall, promote mold, and create electrical hazards. Dry the area, replace damaged materials when needed, and keep up with routine inspections. That’s the whole shebang: prompt, careful restoration protects your home, your health, and your ceiling’s long-term integrity.